Assignment Goals
The primary goals of this assignment are:
- Extend the core Unreal Engine code.
- Create a new UE4 material node.
- Get experience with the strategy of finding and replicating an example, then changing it to suit your needs.

For this assignment, you'll be creating a new native MaterialExpression node for the UE4 material editor. Material editor nodes are part of the "Engine" module, and adding a new one requires editing the code in that module.
You will create a native material editor node to generate color spectrum given a floating point input. Your node will support any of the non-texture-based spectral curves from Alan Zucconi's Improving the Rainbow Part 1 and Part 2 blog posts.
This blog provides HLSL shader code, a shadertoy with GLSL shader code, and a Unity project. As is typical of real-life instances when you want to implement an existing technique into an engine, you may find some sample code, but that code may be in a different language, or for a different engine than you need. You can use these kinds of examples, but will need to modify them a bit to make them work within UE4. You will also have to look to examples within UE4 for the material node plumbing necessary to get it into the engine.
Details
Create a project
- Create a a Blank Blueprint project with no starter content called
assn6.- Since you'll only be working with C++ engine code, you do not need the game project itself to be C++. Startup times will be faster if it is not.
- As usual, put the project at the top level of your git repository
- Remember, to launch a Blueprint project directly from visual studio (necessary to be able to set breakpoints in your engine code), you will need to choose UE4 as your startup project, and add an
assn6/assn6.uprojectcommand line parameter to the debugging startup options.
Create your spectral node
- Find a reasonably uniquely named simple material node. Replicate its code to reproduce its functionality with a new name.
- Since the Engine module is widely used, recompiles for minor edits will take a while as it relinks all of the dependent shared libraries (5 minutes for a single cpp change on my laptop), though fortunately not as long as needed for a full engine build.
- Given the compile times, it'll be worth it to spend some extra time double-checking for simple syntax errors and the like rather than relying on the compiler to report them, though code errors will cause the compile to fail before the linking phase.
- Modify your node to implement the spectral functions. If your template node didn't have one of the features you need, look at other nodes for supporting examples, and copy over what they are doing.
- You should have one float input pin.
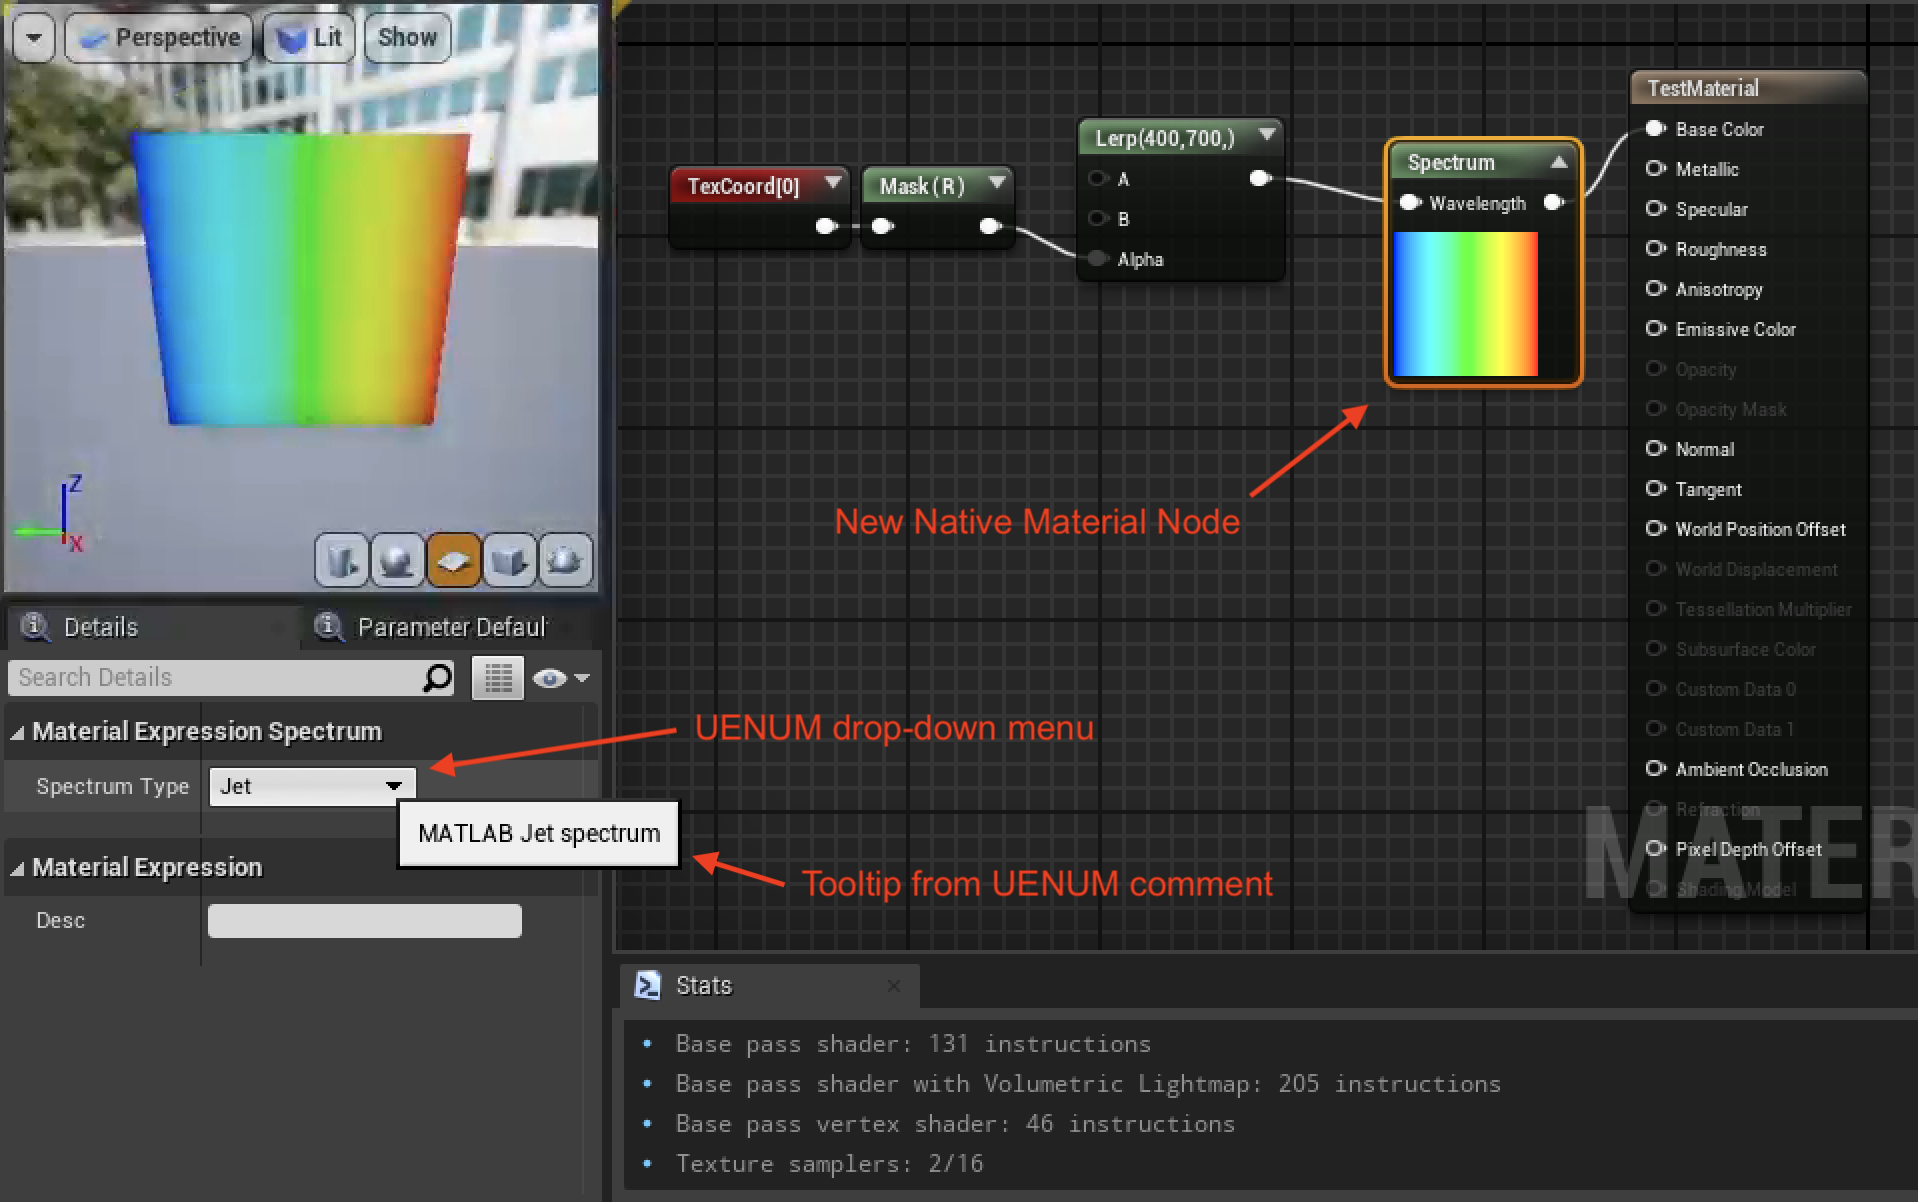
- You should have a UENUM selection in your node's Details panel to choose which spectral model to use.
- The output pin should be a float3 color.
- For fastest iteration time, the C++ code for your material node should primarily just call some shader function defined in Common.ush.
- Once calling this function is working (and even before the function itself works), you can edit the Common.ush code and recompile one testing material repeatedly without having to recompile the C++ code or all of the other shaders dependent on Common.ush.
- When you quit and restart the engine, it will recompile all shaders dependent on Common.ush, so do this as rarely as you can.
- When debugging core shader file changes, you may want to set the r.ShaderDebugMode console variable to 1 in your Engine/Config/ConsoleVariables.ini
- Create a test material that can show your spectral node and its variations in action.
Grad Students
No special grad student part this time
Extra Credit
For up to 10 points of extra credit, also implement the texture-based spectrum. You can get a suitable texture by downloading the spectral map image from the blog page. For full credit, the spectrum image must be added to the core engine. Look at the internal textures used by the Noise or Sobol nodes for examples. Note that for this extra credit, you will have to touch a widely used header file that will cause a major rebuild. Plan accordingly.
Submission
For full credit, you must commit multiple times during your development.
Add an assn6.txt. Tell us what works and what doesn't, and anything else you think we should know for grading.
Include a screen shot of a material showing your spectral material node in action
Also include a screen shot of the material editor for your test material(s) like the image at the top of this assignment. Make sure your new node is selected so we can see what is set in the detail panel. You do not need to show the tool tip. You can capture a screen shot of the full material editor window with the "EditorScreenShot" console command (By default, EditorScreenShot captures the main editor window to the Saved/Screenshots directory. Dock the material editor window with the main UE4 window, or use "EditorScreenShot Name=window-name" to capture an image of the material editor).
Push to your repository, and tag your final commit with an assn6 tag.