Before you start
This assignment builds on the previous one. If your assignment 1 worked, I strongly recommend using your own code as a starting point for this assignment. If you were not able to get yours working, I will provide access to sample code after the assn1 late submission deadline. You are free to either use this code to figure out what was wrong with your assignment, or use it as a base for this one.

Overview
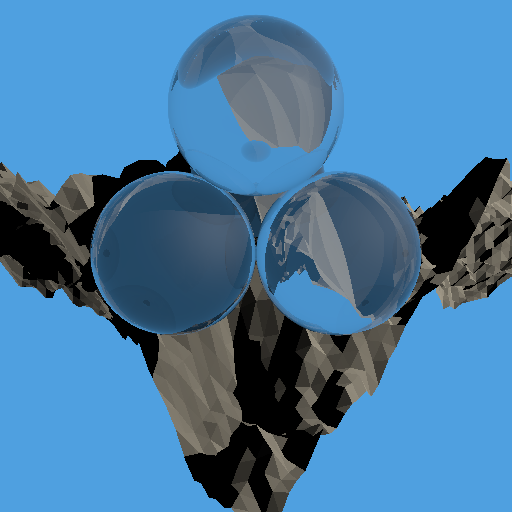
For this assignment, you will add mirror reflection and direct illumination with shadows to your ray tracer (shown at right from balls.pi).
Assignment Goals
The primary goals of this assignment are:
- Add ambient, diffuse, and specular illumination with shadows to assn1
- Add recursive reflection (& refraction) to assn1
Code Organization
You will want two ray tracing functions. The first, commonly called trace or firsthit, should be a recursive function, returning the overall color from tracing into the scene. That is, it should find the first intersection along the ray, and return a weighted sum of direct illumination from each light and the color produced by a recursive trace of a second ray along the reflection direction. The recursion should stop at either 15 levels of recursion or when the product of the reflection coefficients along the ray is less than 1/255, whichever comes first.
The second function, commonly called probe or anyhit, is used for shadow testing. It only needs to return whether there were any intersections between the ray start and end. It can stop intersection testing as soon as it has found any hit in that range.
Computing the Color
To support these features, you will need to handle polyray keywords for ambient, diffuse, specular, microfacet, and reflection, resulting in the following variables and parameters that will be used to compute the surface color for a ray:
| | | |
| $C =$ | final color returned by $\mathrm{trace}(\overrightarrow{\mathit{ray}})$ |
$\overrightarrow{\mathit{ray}} =$ | incoming ray direction |
| $r =$ | reflection scale |
$R =$ | reflection color |
| $a =$ | ambient scale |
$A =$ | ambient color |
| $d =$ | diffuse scale |
$D =$ | diffuse color |
| $s =$ | specular scale |
$S =$ | specular color |
| $e =$ | Phong shininess exponent |
$L_i =$ | light $i$ color |
| $\hat{n} =$ | unit-length surface normal |
$\hat{v} =$ | unit length "view" vector: $-\mathrm{normalize}(\overrightarrow{\mathit{ray}}$) |
| $\hat{l}_i =$ | direction to light $i$ |
$\hat{h}_i =$ | half vector: $\mathrm{normalize}(\hat{v}+\hat{l}_i)$ |
| $\left<\hat{a}\cdot\hat{b}\right> =$ | dot product clamped to 0–1 |
We are using a layered surface model. Each layer computes a Fresnel reflectance using the Schlick approximation, and uses that for a weighted average of the colors from the layer(s) above and the layer(s) below.
The outermost layer is mirror reflection, with $F_0=r$
\[
F_\mathrm{refl}=F_0+(1-F_0)(1-\left<\hat{n}\cdot\hat{v}\right>)^5\\
C=(1-F_\mathrm{refl})C_\mathrm{rest}+F_\mathrm{refl}R*\mathrm{trace}(\mathrm{reflect}(\hat{n},\hat{v}))
\]
The next layer includes the ambient term and the contribution from each light
\[
C_\mathrm{rest}=a*A + \sum_i{\mathrm{probe}(\hat{l}_i)*L_i*\left<\hat{n}\cdot\hat{l}_i\right>*C_{\mathrm{light}_i}}
\]
For each (unshadowed) light, there is a contribution from a specular layer with $F_0=s$ over a contribution from a diffuse layer. This blend factor between these terms uses Fresnel for the view-to-light direction, rather than the view-to-reflection direction (so using $\hat{h}$ instead of $\hat{n}$).
\[
F_{\mathrm{light}_i}=F_0+(1-F_0)(1-\left<\hat{h}\cdot\hat{v}\right>)^5\\
C_{\mathrm{light}_i} = (1-F_{\mathrm{light}_i})*d*D + F_{\mathrm{light}_i}*S*\left<\hat{n}\cdot\hat{h}_i\right>^{e}*\frac{e+2}{8}
\]
Use floating point for all color values until it is time for conversion to the final 8-bit pixel values. Your floating point to byte conversion should include: clamping out-of-range values to avoid overflow, gamma correction with a factor of 1/2.2, scaling by 255, then type conversion from float to unsigned char.
Sample Images
To help with your development and debugging, here are the effects of each components (shown from balls3-color.ri)
balls3-color.pi:
Diffuse |
balls3-color.pi:
Diffuse + Specular |
balls3-color.pi:
Diffuse + Specular + Reflection |
balls3.pi:
Diffuse |
balls3.pi:
Diffuse + Specular |
balls3.pi:
Diffuse + Specular + Reflection |
 |
 |
 |
 |
 |
 |
Sample Windows, Mac, and Linux executables here that you may be able to use to generate additional sample images of your own. These versions have been modified to NOT use the project build or data directories, and should be run from the command line in a git bash or terminal window. Run with no arguments to see usage options.
634 only
Also implement refraction for surfaces using the transmission keyword. The mount.pi file includes some refractive spheres.
The refraction scale factors in the spd files are not consistent with the provided indices of refraction. Consider refraction to be a layer under everything else, and combine it with the other layers using $1-F_0=\textrm{refraction scale}$.
The refraction equations are in terms of the ratio of the indices of refraction of the material you are exiting and the material you are entering. Use the dot product of the normal and ray direction at the intersection point to tell if you should use the ratio of air (with index of refraction of 1) to material or material to air. Also, the equations derived in the class slides assume N and V are on the same side of the surface, for a ray entering the back of a surface, you'll need to flip N to compute the correct refraction direction and Fresnel reflectance.
Warning! When ray tracing both reflection and refraction, each object hit may spawn two recursive calls to the trace function. So 15 levels of just reflection could result in up to 15 recursive trace calls per pixel, while 15 levels of both reflection and refraction could result in up to 215-1 trace calls per pixel! It won't be quite that many since the recursion tree will be pruned for rays that don't hit a reflective or refractive surface, but it may still be slow. If your code is too slow on the provided files, you just need to show both reflection and refraction working. You could do that with versions of mount or gears generated with a smaller -s parameter, with your own hand-created test files, or by creating modified versions of some of the provided files, similar to the way I made balls3-color by modifying the original balls3.
Extra credit
For up to 5 points of extra credit, make your ray tracer run faster by parallelizing it. I recommend C++ std::thread as more portable than some of the OS-specific parallel thread libraries.
For 10 points of extra credit, make it run faster with an acceleration structure, either BVH or spatial partitioning. Often these methods do not pay off until you are rendering multiple frames, so report separate timing for data structure generation and the final ray trace.
You can do either parallelization or acceleration structure, or both for a possible total of 15 points extra credit.
What to turn in
Turn in this assignment electronically by pushing your source code to your class git repository by 11:59 PM on the day of the deadline and tagging the commit assn2. Do your development in the trace directory so we can find it (we'll be able to use the assn2 tag to find that version for grading, so you can just continue development in the same directory you used for assn0 and assn1).
Commit one or a few sample ppm images in your trace directory so we can see your results before running.
Also include an gfx26/assn2.txt file at the top level of your repository telling us about your assignment. Tell us what works, and what does not. Describe your sample image files by name so we can know what they are. Also tell us what (if any) help you received from books, web sites, or people other than the instructor, TA, text, and class slides.
You must make multiple commits along the way with useful checkin messages. We will be looking at your development process, so a complete and perfectly working ray tracer submitted in a single checkin one minute before the deadline will NOT get credit. Individual checkins of complete files one at a time will not count as incremental commits. Do be sure to check in all of your source code, but no build files, log files, zip files, libraries, or other non-code content.