Assignment Goals
The primary goals of this assignment are:
- Do some user-level C++ coding typical of what would be done for a game.
- Get some experience tracking down information in a large codebase.
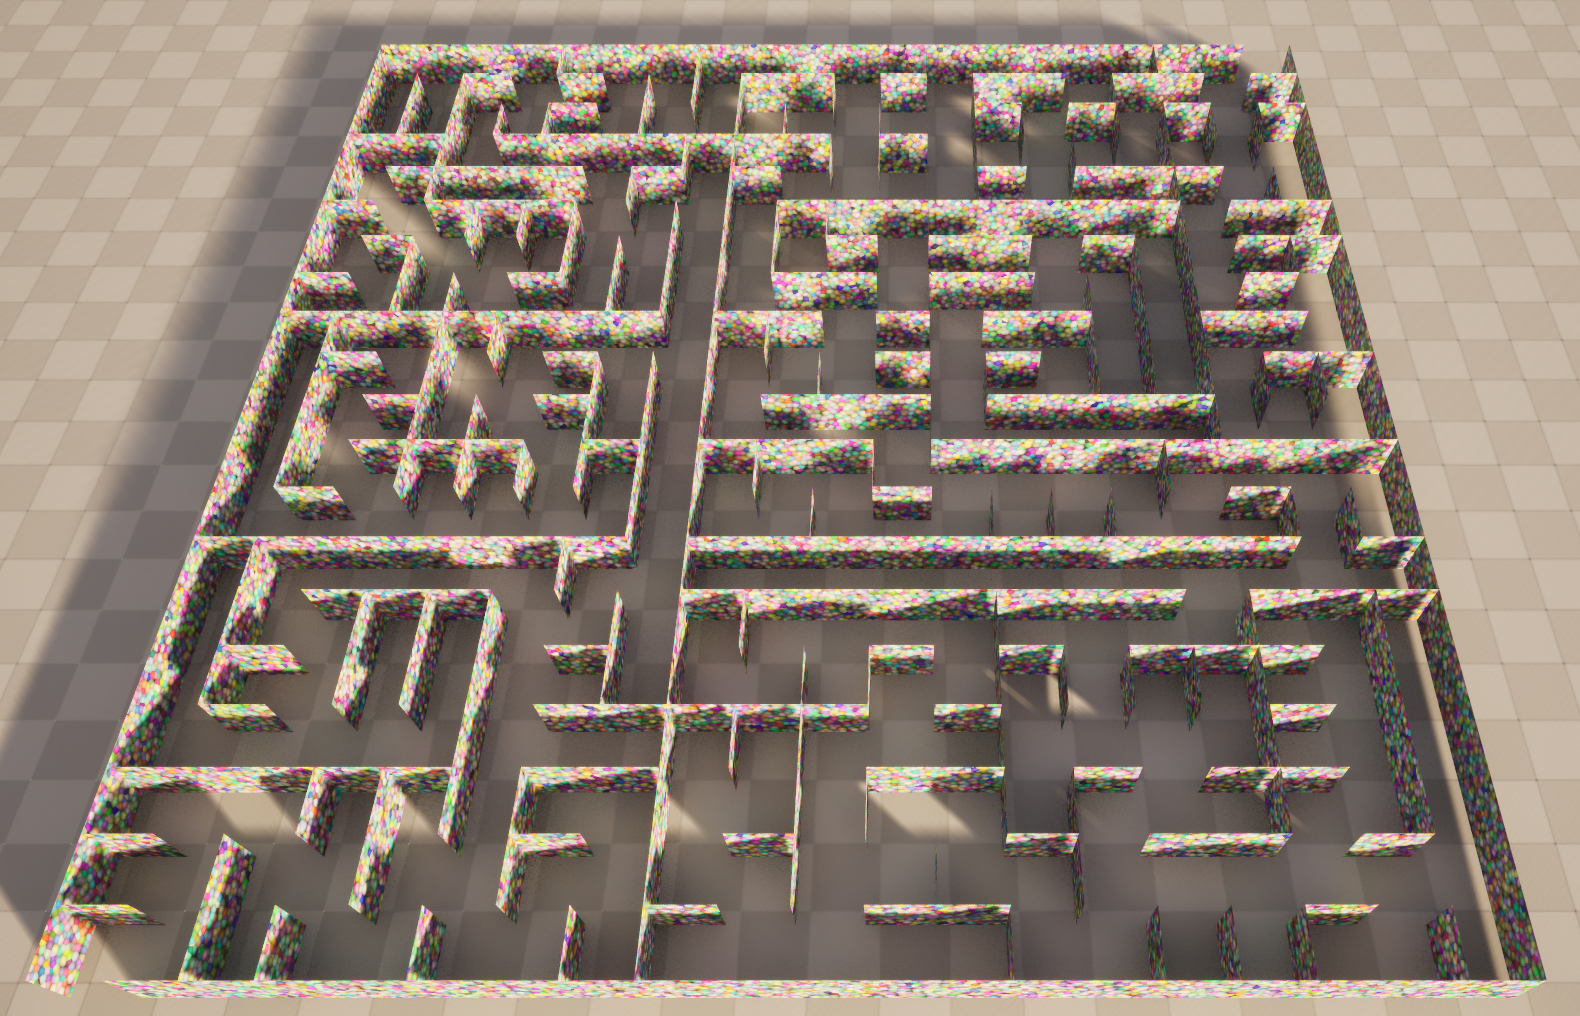
For this assignment, you'll be creating C++ Actor to build a maze using Kruskal's algorithm. In your constructor, you will create a USceneComponent as the root component for the actor, and a UInstancedStaticMeshComponent, for the walls. You will override the virtual OnConstruction() function, to run the maze generation algorithm and add the resulting walls to the UInstancedStaticMeshComponent to create the maze.
Details
I've given some fairly explicit steps to help you along, but this time I'm expecting you to do a little more this time in terms of following and generalizing examples of certain functionality in the engine code or online.
Create a project
- Create a Basic C++ project called proj2
- Put it in top level of your git repository (alongside the Engine directory and your proj1 project directory).
- Create a level/map called proj2 and set it as your startup map.
C++ actor
- Create a new C++ actor
- Since the C++ Classes directory won't be visible in the Content Drawer yet, you can do this from the Tools menu.
- UE5 will create a header and C++ file with starter code. Make sure the class it creates is derived from AActor.
- Test that you can drag it into the scene. Look in the "World Outliner" window to make sure it's there.
- You can get rid of the BeginPlay() and Tick() functions that it creates for you, since we will not be using them.
Add a SceneComponent and StaticMeshComponent
The SceneComponent allows the actor to be placed and dragged around the map. A mesh component allows the Actor to be rendered in the scene. We'll start with a UStaticMeshComponent, which renders a single mesh before moving on to the UInstancedStaticMeshComponent.
- Create a USceneComponent for actor placement, and set it as the RootComponent.
- Search all of the Engine cpp files for RootComponent for examples.
- Some, like PaperTerrainActor.cpp, assign directly into the RootComponent member variable.
- Others, like ControlRigControlActor.cpp use the SetRootComponent() member function.
- Add a single TObjectPtr<UStaticMeshComponent> as a new member variable, tagged with the UPROPERTY() macro so it'll be serialized.
- Manipulator.h and Manipulator.cpp are one example of this, though it does more than you need: you really only need the FObjectFinder, SetupAttachment, and SetStaticMesh.
- I suggest initially loading a sphere as your mesh, since you don't need to worry about having a two-sided material on it like you do with a plane. In the "Content Drawer" window, you can select "Settings" and enable "Show Engine Content". Then in the "Engine" content folder search for "Sphere". Find the 100x100x100 one from Engine/BasicShapes, right click, and choose "Copy Reference" to get the name to paste in your code in the call to FObjectFinder()
- You don't really need to worry about setting a material at this stage. If you don't, you'll get the default grid material, which is fine for testing.
Make the Material changeable
- Add a TObjectPtr<UMaterialInterface> member to your actor class, tagged as UPROPERTY(EditAnywhere). It'll show up in the detail window, and you'll be able to drag a material into it.
- Override the OnConstruction() virtual function and use MeshComponent->SetMaterial() to change your material. The manipulator example uses a dynamic material, which allows run-time animated changes to material parameters. We don't need that, so plain SetMaterial() is fine.
- Create a two-sided material.
- There is a two-sided check box in the detail window when the output block for your material is selected in the material editor.
- You can create your material using either just the material editor or using shader code. In fact, a black material with defaults for all of the output pins is fine.
- In the pictures here, I made a simple one based on Absolute World Position, and a couple of the options in the Vector Noise node. Using Absolute World Position allows the materialto continue seamlessly from wall to wall.
- Set your actor to use the material you created.
Fixed-sized Grid of walls
To render many copies of the same mesh, we'll want to switch to a UInstancedStaticMeshComponent. This has a TArray of FInstancedStaticMeshInstanceData, each with a transform providing the position and orientation for that instance.
- Switch from the UStaticMeshComponent to a UInstancedStaticMeshComponent.
- To avoid having an ever-growing set of walls on top of each other, you'll want to make a new UInstancedStaticMeshComponent each time your OnConstruction() function is run.
- Search for NewObject<UInstancedStaticMeshComponent> for some examples of making a new UInstancedStaticMeshComponent outside of the constructor, and RemoveFromRoot and/or UnregisterComponent for how to remove the old one.
- You'll need to add at least one instance using AddInstance() to see anything.
- The FTransform argument to AddInstance is relative to the actor location, so all of the instances will move with the actor. The default FTransform() or FTransform::Identity will put the instance exactly at the actor location.
- Once you have one the instanced static mesh working, make sure you can place them on the maze grid.
- Change the shape to the 100x100 BasicShapes Plane
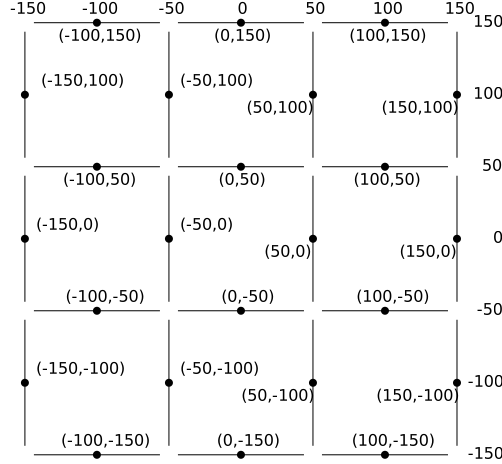
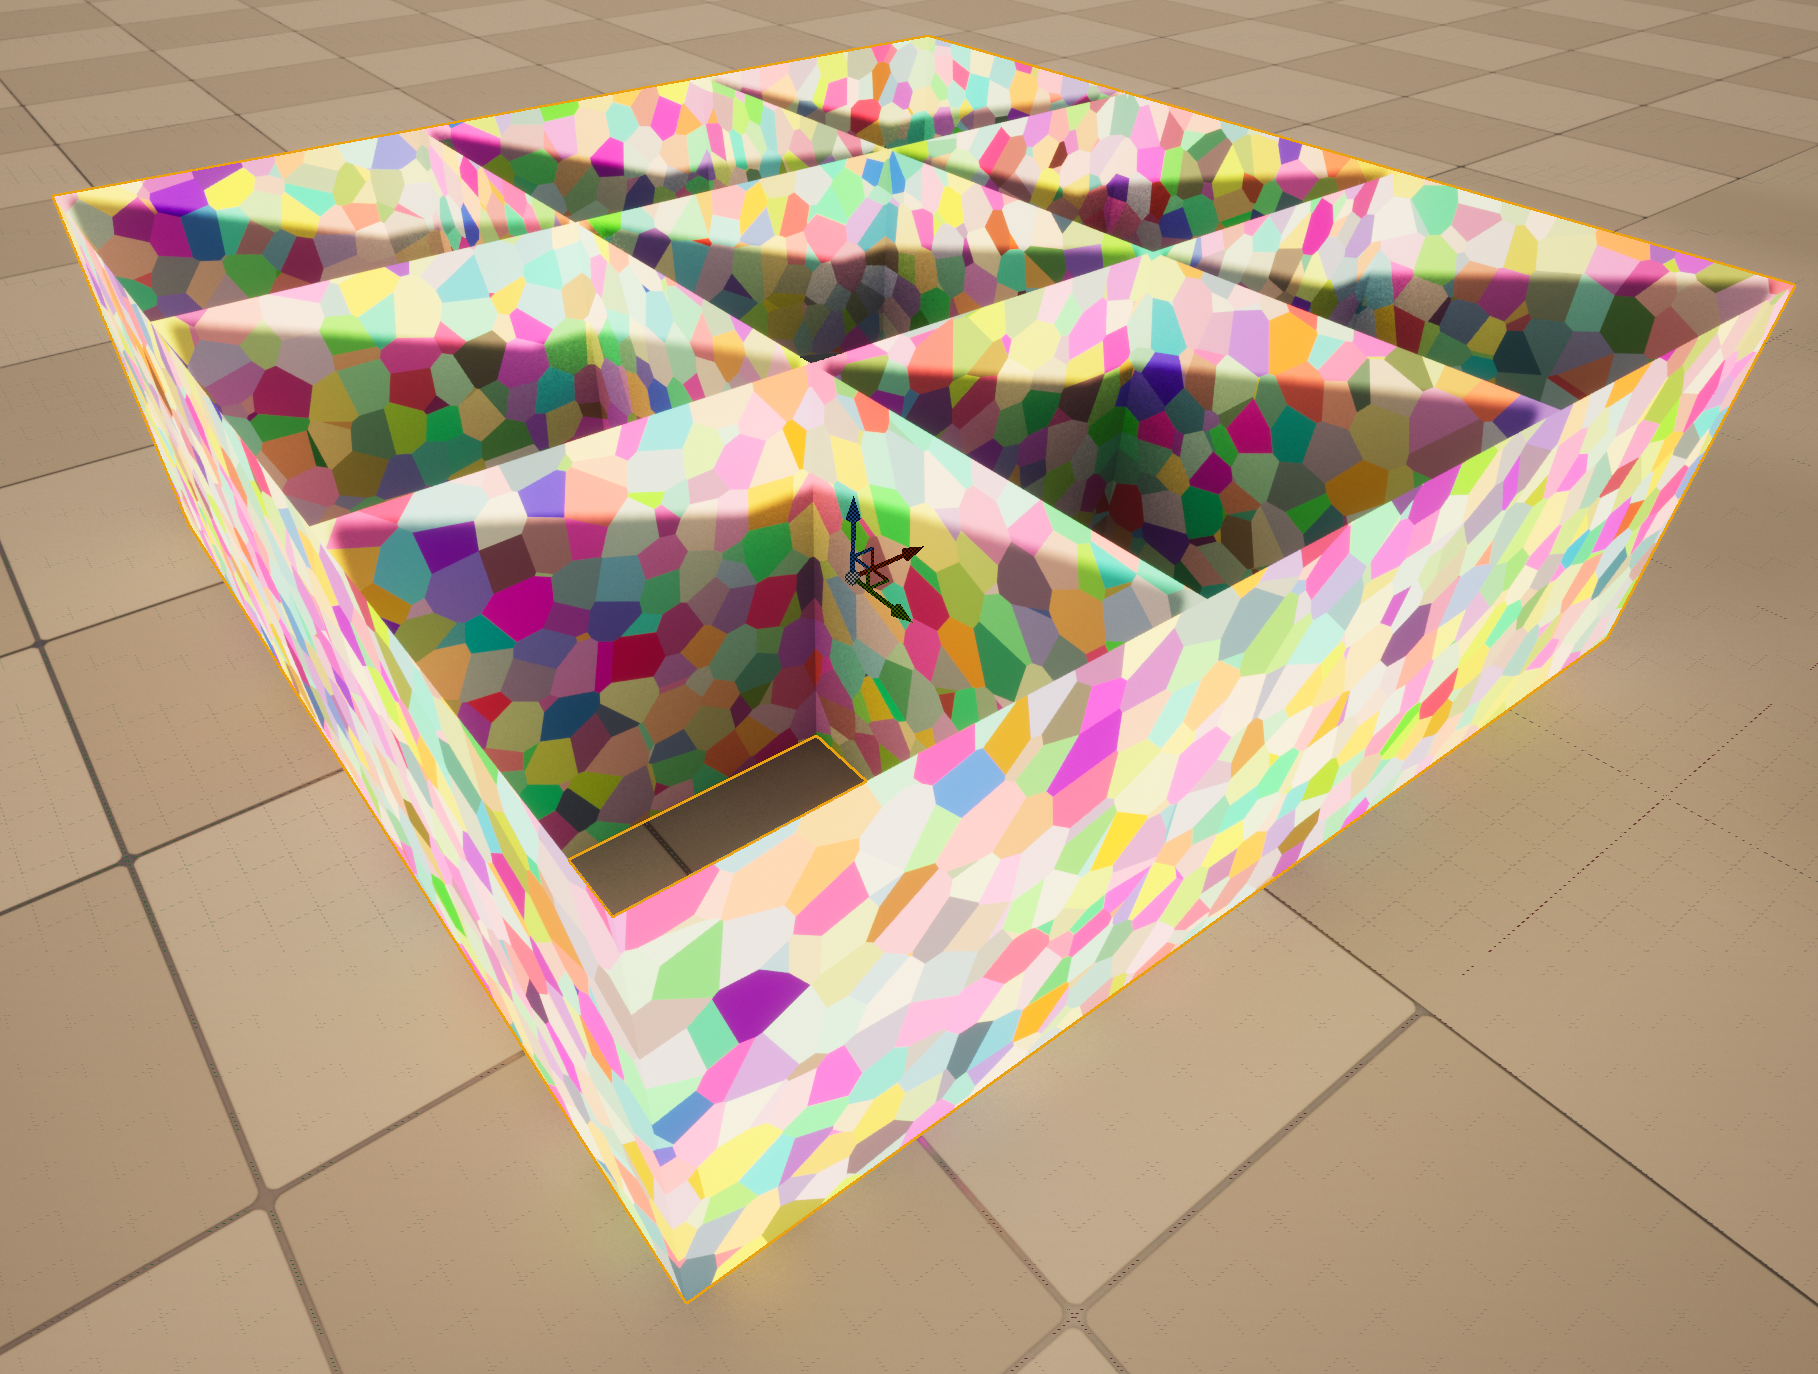
- The BasicShapes plane is aligned with the X/Y plane. To use it for your walls, you'll need to use a 90 degree rotations to orient it vertically along the X/Z or Y/Z planes, and translations that are multiples of 50.
- Use the FTransform constructor that takes an FRotator to set the instance orientation and FVector to set the instance position. You'll find those in the templated TTransform base class. The arguments to FRotator are the same as the Rotation in the transform panel, though confusingly not in the same order.
- I suggest creating helper functions to place a vertical or horizontal wall that handle the necessary rotation and translation for the wall placement.
Make your maze
- Implement the maze algorithm in your OnConstruction() function.
- Since the maze generation is completed in a single call to OnConstruction, the data to create the maze does not need to be saved with the actor, so does not need to be restricted to data that UE knows how to serialize.
- As a result, you can use Unreal's data structures or core C++ data stuctures in your generation
- Nonetheless, do not add any additional external libraries or dependencies.
- Add an integer seed property to your class, visible in the editor, that you can change to generate different mazes (or re-create a good previously generated maze).
- While you do not need to serialize your random number generator state, you do want it to be consistent across platforms, so the same random seed will generate the same maze no matter where you run.
- To achieve that, you should use the FRandomStream class built into UE for these random numbers.
- Look in RandomStream.h for the FRandomStream class declaration to see how to seed it, and how to get random numbers from it.
Grad Students
Instead of just using the plane object for the wall, make it EditAnywhere and changeable in the actor Detail panel, with the plane as the initial default. Change the grid spacing to fit the size of whatever wall object is set.
Submission
For full credit, you must commit multiple times, showing your incremental development processs.
Capture images of your maze using several different seeds. You can use the windows or mac screen shot tools, or EditorScreenShot console command. Make sure your screen shots are from a view from above showing the full maze.
Add an proj2.txt to the top directory. Tell us what works and what doesn't, and anything else you think we should know for grading. Include links to your screen shot images and make sure they are accessible for grading.
Push to your repository, and tag your final commit with an proj2 tag.